Sunday, 27 December 2009
Apple's AppStore a goldmine or ...
Saturday, 26 December 2009
drawing graphics for the iPhone (not opengl ES)

- (void)drawRect:(CGRect)rect {
// Drawing code
float width = rect.size.width ;
float height = rect.size.height ;
CGContextRef currentContext ;
int i = 0 ;
// Get the graphics context that we are currently executing under
currentContext = UIGraphicsGetCurrentContext() ;
;
In the first lines of the drawRect, I save the width and the height, I'll use this to calculate the scale factors.
To understand this you need to know a bit of coordinatesystems. The iPhone coordinates are simply the pixels that can be drawn. So for example a view can be 200 px wide and 300 px high.
But of course what more important is , is the world coordinatessystem. And these coordinates are the coordinates of your world.
For example if I want to plot 600 points and the range of those points are between 0.5 and 3.5 then my user coordinatessystem is: X-axis =(0,600) Y-axis = (0.5,3.5).
So to convert user points into iphone points (or view points) I need to apply a scale factor. The scale factor is calculated as follows.
#define OFFSET_X 30.0f
#define OFFSET_Y 10.0f
scale_factor_x = ( width - OFFSET_X ) / ( [dataPoints count] - 0 );
scale_factor_y = (height - OFFSET_Y ) / (max_y - min_y ) ; // max_y = max(dataPoints) ;min_y = min(dataPoints)
Note: OFFSET_X and OFFSET_Y are 2 constants to let some space in the view where I can are plot the axes and labels of the axes.
So let's draw the axes , please note that in this first version I don't use CGPath's , later I'll refactor the code and use CGPath's.
And also be aware that I use the default orientation and default location of the origin of the view ( point (0,0) is in the upper left corner).
// draw the axes
CGContextSetRGBStrokeColor(currentContext, 0.83, 0.83, 0.83, 0.7); // this is sort of gray
CGContextMoveToPoint( currentContext, OFFSET_X, height - OFFSET_Y );
CGContextAddLineToPoint( currentContext, OFFSET_X, OFFSET_Y );
CGContextMoveToPoint( currentContext, OFFSET_X, height - OFFSET_Y );
CGContextAddLineToPoint( currentContext, width, height - OFFSET_Y );
CGContextStrokePath(currentContext);
And draw some gridlines
CGContextSetRGBStrokeColor(currentContext, 0.83, 0.83, 0.83, 1);
CGFloat len[] = {4,2} ;
CGContextSetLineDash( currentContext, 0, len, 2 ) ;
for ( i = OFFSET_X ; i <= height ; i = i + OFFSET_X )
{
CGContextMoveToPoint( currentContext, OFFSET_X, height - OFFSET_Y - i );
CGContextAddLineToPoint( currentContext, width, height - OFFSET_Y - i);
}
CGContextStrokePath(currentContext);
And then draw the graph of datapoints
CGContextSetRGBStrokeColor(currentContext, 1.0, 0.65, 0, 1);
UIImage *red = [UIImage imageNamed: @"red.png"] ;
UIImage *green = [UIImage imageNamed: @"green.png"] ;
CGPoint aPoint ;
// draw the history graph
for( i = 0 ; i< [dataPoints count] ; i++ )
{
x = OFFSET_X + i * scale_factor_x ;
old_y = [[dataPoints objectAtIndex: i] floatValue];
y = (height -OFFSET_Y) - ([[dataPoints objectAtIndex: i] floatValue] - min_y) * scale_factor_y ;
if ( old_x < 0 )
{
CGContextMoveToPoint( currentContext, x, y );
old_x = x ;
}
else
{
old_x = x ;
CGContextAddLineToPoint( currentContext, x, y );
}
}
CGContextStrokePath(currentContext);
And now I show you how to add text in the graph (drawing the Y-labels, I will not give the code for the X-labels).
// this is for the font
CGContextSetRGBStrokeColor(currentContext, 1, 1, 1, 1);
CGContextSetRGBFillColor(currentContext, 1.0, 1.0, 1.0, 0.8);
CGContextSelectFont(
currentContext,
"Helvetica-Bold",
FONT_SIZE,
kCGEncodingMacRoman
);
// this transformation is to make sure that the text is written in the right direction
CGAffineTransform transform = CGAffineTransformMake(1.0,0, 0.0, -1.0, 0.0, 0.0);
CGContextSetTextMatrix(currentContext, transform);
CGContextSetTextDrawingMode(currentContext, kCGTextFill);
// set Y-labels
float j1 = min_y ;
float step = (max_y - min_y)/ 7.0f ; // 7 labels
for ( i = 0.0f ; i <=height ; i = i + OFFSET_X )
{
// set the precision of the label
if ( j1 > 999.0f )
{
s1 = [NSString stringWithFormat:@"%4.0f", j1] ;
}
else
{
s1 = [NSString stringWithFormat:@"%4.2f", j1] ;
}
j1 += step ;
CGContextShowTextAtPoint( currentContext,0 , height - OFFSET_Y - i , [s1 UTF8String] , [s1 length] ) ;
}
CGContextStrokePath(currentContext);
Friday, 4 December 2009
Its finally there
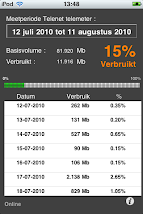
iSignals, for the active investor. This application integrates with an proprietary investment engine , this investment engine holds a computer-generated portfolio with more than 17000 equities on 28 different stockmarkets and with 9 years of historical data.
On the daily basis the engine generates computer managed portfolios with buy&sells of those equities (portfolio's are organized per market).
The engine is based on a combination of technical analysis models, artificial intelligence (pattern detection) and a neural network.
Via iSignals the user can subscribe to one or more computer managed portfolio's and as such receiving the buy/sells from the engine.
The user can now use those computer generated signals as a guidance in his investment decisions.
The advantage of the application is that the user can consult the engine's portfolio's wherever he wants and whenever he wants. The user can also consult quote data for each instrument (data from finance.yahoo.com) on his iPhone/iPod Touch.
Friday, 31 July 2009
iPhone SMS hack
Saturday, 25 July 2009
iPhone user experience
Tuesday, 21 July 2009
Multitasking for the iPhone: something simple
Saturday, 13 June 2009
IPhone application, iSignals, goes beta


Thursday, 11 June 2009
Iphone and memory management
Sunday, 24 May 2009
Iphone & Cocoa Touch : the final frontier


Wednesday, 22 April 2009
NSDateFormatter in OSX 10.4.11
If I execute the following code :
NSDateFormatter *timeFormatter = [[[NSDateFormatter alloc] init] autorelease];
[timeFormatter setDateStyle:NSDateFormatterNoStyle];
[timeFormatter setTimeStyle:NSDateFormatterMediumStyle];
NSDate *stringTime = [NSDate date];
NSString *formattedDateStringTime = [timeFormatter stringFromDate:stringTime];
[theTime setStringValue: formattedDateStringTime] ;
Then , instead of displaying the time, it shows me the date.
If I add the following line on top :
[NSDateFormatter setDefaultFormatterBehavior: NSDateFormatterBehavior10_4] ;
It gives me correctly the time.
is this something specific for the 10.4.11 ? Is this behavior also observed in the 10.5.X ?
Saturday, 18 April 2009
Application badge in Dock

Now for the poor people who still have a pre 10.5 version, or for the people who want more capabilities than what Leopard offers, I wrote an utility class based on the example code found in CocoaDev.
This utility class does not only gives the capability to draw the badge gives also the possibility to change the position of the badge :


Changing the font size of the badge:


Changing the color of the badge:


The code can be downloaded here.
Thursday, 16 April 2009
NSNumberformatter: some examples
I copy them here , as I use my own blog as a sort of FAQ or HOW-TO for myself.
-(NSString*) formatCurrencyValue:(double)value
{
NSNumberFormatter *numberFormatter = [[NSNumberFormatter alloc] init];
[numberFormatter setFormatterBehavior:NSNumberFormatterBehavior10_4];
[numberFormatter setCurrencySymbol:@"$"];
[numberFormatter setNumberStyle:NSNumberFormatterCurrencyStyle];
NSNumber *c = [NSNumber numberWithFloat:value];
return [numberFormatter stringFromNumber:c];
}
-(NSString*) formatPercentValue:(double)value
{
NSNumberFormatter *numberFormatter = [[NSNumberFormatter alloc] init];
[numberFormatter setFormatterBehavior:NSNumberFormatterBehavior10_4];
[numberFormatter setPercentSymbol:@"%"];
[numberFormatter setNumberStyle: NSNumberFormatterPercentStyle];
[numberFormatter setDecimalSeparator:@"."];
[numberFormatter setGeneratesDecimalNumbers:TRUE];
[numberFormatter setMinimumFractionDigits:2];
[numberFormatter setRoundingMode: NSNumberFormatterRoundUp];
[numberFormatter setRoundingIncrement:[[NSNumber alloc]initWithDouble:0.05]];
NSNumber *c = [NSNumber numberWithFloat:value];
return [numberFormatter stringFromNumber:c];
}
-(double) formatDoubleFromCurrency:(NSString*)value
{
double ret ;
if(value)
{
ret = [value doubleValue];
if (ret == 0)
{
NSNumberFormatter *numberFormatter = [[NSNumberFormatter alloc] init];
[numberFormatter setFormatterBehavior:NSNumberFormatterBehavior10_4];
[numberFormatter setCurrencySymbol:@"$"];
[numberFormatter setNumberStyle:NSNumberFormatterCurrencyStyle];
NSNumber *c = [numberFormatter numberFromString:value];
ret = [c doubleValue];
}
return ret;
}
else
return 0.0;
}
NSButton: setting an image in a button
NSString* im1 = [[NSBundle mainBundle] pathForResource:@"arrow right" ofType:@"png"];
NSURL* url2 = [NSURL fileURLWithPath:im1];
NSImage *image = [[NSImage alloc] initWithContentsOfURL: url2];
[toggleButton setImage: image] ;
NSString *im2 = [[NSBundle mainBundle] pathForResource:@"arrow left" ofType:@"png"];
url2 = [NSURL fileURLWithPath:im2];
image = [[NSImage alloc] initWithContentsOfURL: url2];
[toggleButton setAlternateImage: image] ;
The code above set's 2 images in a toggle button .
Note that if you want transparant images , you need .png files and not jpeg's (GIF also works)
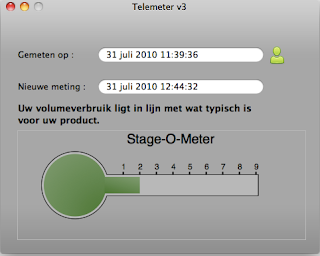
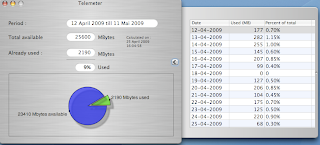
For telenet users: a telemeter application

Installation is very easy :
1. Open the dmg file (download here) ;
2. drag and drop the folder 'Telemeter' wherever you want ;
3. Start the Telemeter v2 application.
The very first thing when you start the application a popup will come up to warn you that you need to set your telenet username/password . This can be done clicking the green user icon (on the first line on the right). And if all is oke you should see your usage.
In the screen you see also a button with an arrow (>) , if you click that you'll get the daily usage details.

The application will update the data from Telenet every 30 minutes.
2. Change the icon colour depending on the used bandwidth
Note: this is a first version , so please report any bugs to me (via blog or email). Comments are also welcome of course.
1. you see in the tray bar (system menu bar) the percentage used :

2. In the dock , the icon will also show the percentage used

3. several small bugfixes
UPDATE 4 : major enhancements
Tuesday, 14 April 2009
Drawing pie charts
Unfortunealy I didn't find much on the Internet, so I've started to experiment a bit myselfs.
The following code draws a pie chart with one slice exploded from the other :
The trick is that you draw an imaginary circle around the center, on this circle is the center of the 'exploded' slice.
#define PI 3.14159265358979323846
NSBezierPath *greenPath = [NSBezierPath bezierPath] ;
// set some line width
[greenPath setLineWidth: 2 ] ;
// move to the center so that we have a closed slice
// size_x and size_y are the height and width of the view
[greenPath moveToPoint: NSMakePoint( size_x/2, size_y/2 ) ] ;
// draw an arc (perc is a certain percentage ; something between 0 and 1
[greenPath appendBezierPathWithArcWithCenter:NSMakePoint( size_x/2, size_y/2) radius:50 startAngle:0 endAngle: 360 * perc ] ;
// close the slice , by drawing a line to the center
[greenPath lineToPoint: NSMakePoint(size_x/2, size_y/2) ] ;
[greenPath stroke] ;
[[NSColor greenColor] set] ;
// and fill it
[greenPath fill] ;
greenPath = [NSBezierPath bezierPath] ;
[[NSColor blackColor] set] ;
[greenPath setLineWidth: 2 ] ;
// draw the second slice, now exploded from the original center
// so to get it exploded I move (10,7) points from the original center
// but on the imaginary circle (thats why the cos and the sin)
// note mide_angle is the angle halve way from the arc, you can experiment with multiple
// angles, note also that the angle is in degrees
[greenPath moveToPoint: NSMakePoint(size_x/2 - 10 * cos ( PI * mid_angle / 180 ) , size_y/2 - 7 * sin ( PI * mid_angle / 180 )) ] ;
// and now draw the other slice
[greenPath appendBezierPathWithArcWithCenter:NSMakePoint( size_x/2 - 10 * cos ( PI * mid_angle / 180 ) , size_y/2 - 7 * sin ( PI * mid_angle / 180 )) radius:50 startAngle:360 * perc endAngle:360 ] ;
// close the slice
[greenPath lineToPoint: NSMakePoint( size_x/2 - 10 * cos ( PI * mid_angle / 180 ) , size_y/2 - 7 * sin ( PI * mid_angle / 180 ) ) ] ;
[greenPath stroke] ;
[[NSColor blueColor] set] ;
[greenPath fill] ;
The result of above code is here :

Next time I'll add some code to add text to the slices
Tuesday, 7 April 2009
SOAP: webservices in Objective-C/Cocoa
My ISP (telenet in Belgium) is using a nice web page where you can check your quota but they also offer a webservice which gives full statistics on the bandwidth usage.
So I decided to build a Dashboard widget (in Objective-C, not in Javascript) to see the statistics from my desktop.
Now I didn't do any SOAP/Webservices since a long time , and I never did in Objective-C (my experience goes back to VisualWave, Smalltalk and Java).
So I did some experimentation with the samples from Apple itself :
// SOAP request settings
NSURL *url = [NSURL URLWithString:@"https://telemeter4tools.services.telenet.be/TelemeterService"];
// the name of the webservice
NSString *method = @"getUsage";
// the namespace
NSString *namespace = @"https://telemeter4tools.services.telenet.be/";
// SOAP request params
NSDictionary *params = [NSDictionary dictionaryWithObjectsAndKeys:@"**username**",
@"string",
@"**password**",
@"string0",
nil];
// the parameters itself are in a dictionary, a dictionary is an unordered collection
// so to define the order in which the parameters must be sent
// you need to fill an array with the NAMES of the parameters
NSArray *paramOrder = [NSArray arrayWithObjects:@"string", @"string0"];
// set SOAP request http headers -- some SOAP server impls require even empty SOAPAction headers
NSDictionary *reqHeaders = [NSDictionary dictionaryWithObject:@"" forKey:@"SOAPAction"];
// create SOAP request
WSMethodInvocationRef soapReq = createsoapReq(url, method, namespace, params, paramOrder, reqHeaders);
// invoke SOAP request
NSDictionary *result = (NSDictionary *)WSMethodInvocationInvoke(soapReq);
// get HTTP response from SOAP request so we can see response HTTP status code
CFHTTPMessageRef res = (CFHTTPMessageRef)[result objectForKey:(id)kWSHTTPResponseMessage];
The response of a SOAP requests is a dictionary, and it looks like this :
result: {
"/Result" = { ... <<>> };
"/WSDebugInBody" = "
"/WSDebugInHeaders" = {
"Accept-Ranges" = none;
Connection = close;
"Content-Length" = 4840;
"Content-Type" = "text/xml; charset=utf-8";
Date = "Wed, 08 Apr 2009 06:44:46 GMT";
"Set-Cookie" = "JSESSIONID=JcHpkYZkhhn2pzp1LY7fvGQ1WXkb24WKDY2LBnf0JpLYyhsk23Q1!-344393110; path=/, st8id=c42908deb564326d86d900fd90459934.01.af0318b08a904d84c5824b76a132ab93; domain=.services.telenet.be; path=/, st8id_wat_%2Eservices%2Etelenet%2Ebe_%2F=SlNFU1NJT05JRA__?1607678332ef30e3c1b9fc43cda54cb6; domain=.services.telenet.be; path=/";
};
"/WSDebugOutBody" = <<>>";
"/WSDebugOutHeaders" = {
"Content-Type" = "text/xml";
Host = "telemeter4tools.services.telenet.be";
Soapaction = "";
"User-Agent" = "Mac OS X; WebServicesCore.framework (1.1.0)";
};
"/kWSHTTPResponseMessage" = <<>>
}
Note that I stripped a bit the contents of the dictionary.
Now to get the result of the webservice you must get the proper data from the dictionary (in this case this is data = [result objectForKey: @"result"].
This will return a string value, so a next step is to create an XMLDocument of it :
NSXMLDocument *document ;
NSError *error ;
NSXMLNode *node ;
document = (NSXMLDocument *) [NSXMLDocument document] ;
[document initWithXMLString: data options: NSXMLDocumentTidyXML error: &error ] ;
And once it is in a XMLDocument , you can use XPath expressions to query the document :
myArray = [document objectsForXQuery: @"/ns1:telemeter[1]/ns1:usage-info[1]/ns1:data[1]/@timestamp" error: &error ] ;
Now this looks to me a very complex process to get something from a webservice.
I'm now looking at WSDL and the utility WSMakeStubs to see if I can simplify this.
The nicest thing would be that we have something like JAXB to 'objectify' webservice responses
Sunday, 29 March 2009
Generating mazes

1, Initialize a grid full of walls
2, Start at a particular cell and call it the "exit."
3, Mark the current cell as visited, and get a list of its neighbors. For each neighbor, starting with a randomly selected neighbor:
If that neighbor hasn't been visited, remove the wall between this cell and that neighbor, and then recurse with that neighbor as the current cell.
So to implement this , I'll developed a recursive method (uses more memory and in a later state I can use a stack to avoid recursion).
In objective-C the implementation looks like this (very premature source code of the maze creation program (with animated GUI) can be downloaded here) :
step 1 : Initialize a grid
for ( x = 0 ; x <>
{
for ( y = 0 ; y <>
{
cell = [MazeCell fullCell] ;
[cell x: x ] ;
[cell y: y] ;
[maze atX: x atY: y put: cell]
}
}
A MazeCell is an object that contains four 'wall's' (a wall is here a BOOL that is true or false dending on the fact if the wall is their or not.
Step 2 : the actual generation of the maze
- (void) walkCells: (MazeCell *) aCell
{
int x ;
int y ;
NSMutableSet *neighbors ;
MazeCell *cell1 ;
NSEnumerator *enumerator ;
[aCell visited: YES] ;
x = [aCell x];
y = [aCell y];
neighbors = [NSMutableSet set] ;
if ( x > 0 ) [neighbors addObject: [maze atX: (x-1) atY: y ]] ;
if ( y > 0 ) [neighbors addObject: [maze atX: (x) atY: (y-1) ]] ;
if ( x <>
if ( y <>
enumerator = [ neighbors objectEnumerator] ;
while ( (cell1 = [enumerator nextObject] ) != nil )
{
if ( [cell1 visited] == NO )
{
if ( [cell1 x] == (x-1) )
{
[cell1 rightWall: NO] ;
[aCell leftWall: NO] ;
}
if ( [cell1 x] == (x+1) )
{
[aCell rightWall: NO] ;
[cell1 leftWall: NO] ;
}
if ( [cell1 y] == (y-1) )
{
[cell1 upWall: NO] ;
[aCell downWall: NO] ;
}
if ( [cell1 y] == (y+1) )
{
[aCell upWall: NO] ;
[cell1 downWall: NO] ;
}
[self walkCells: cell1] ;
}
}
}
A little explanation is needed here , in the beginning of the method you see that I build a list of the neighbours of cell.
Now it is important that the list is build in a random order, so therefor I use a NSMutableSet as datastructure. The position in the set depends on the hash that is generated for the object that is inserted.
In my case these objects are of type MazeCell.
So the trick to get them in random order was to implement the hash method on MazeCell and this hash method just returns a random number.
Sunday, 22 March 2009
Drawing in views : background in custom views
In the following example I draw a 'wall' as the background of a view :

The texture I want to apply to my view is the following :

Now its very easy to define this as a texture, you just create a new color , and not just a color but a colorpattern :
Step 1 : find the texture in my resources
NSString* fileName = [[NSBundle mainBundle] pathForResource: @"wall" ofType:@"jpg"];
NSURL* url = [NSURL fileURLWithPath: fileName];
Step 2 : upload the image from the URL
background = [[NSImage alloc] initWithContentsOfURL: url];
Step 3 : define a new color
color = [NSColor colorWithPatternImage:background ] ;
[color set] ;
Step 4 : fill the background
NSRectFill( [self bounds] ) ;
Note that you need to implement this code also in the drawRect: method, to ensure that each time your view get's redrawn that the background is drawn also.
Monday, 16 March 2009
Saving data to files
In that case you can use core data, so lets look at a small example of how this works.
(Consider you already have an application in which you want to include a mechanism to save data).
Step 1 : add a data model
In XCode , you open the file assistant (via File>New File) and select 'data model'

Once you defined the data model , you'll get something like this :

I already added an Entity called HighScores , you add the entity via the menuitem (Design>Data Model>Add Entity).
I a same fashion you can add attributes to the entity (Desgin>Data Model>Add Attribute).
In my case I just defined 3 attributes : name,rank and score.
So this is all their is to define a datamodel (of course this is a very simple datamodel).
Now we need some coding to save information to the datamodel (and to file).
Step 2 : datastore identification
First we need to define in which file we will store the information :
NSError *error ; // this is for error reporting ; see later
NSURL *url = [NSURL fileURLWithPath:@"/Users/Herman/file.xml"];
Step 3 : define the datamodel we will use (= the datamodel in the project)
NSArray *bundles = [NSArray arrayWithObject:[NSBundle mainBundle]];
NSManagedObjectModel *model = [NSManagedObjectModel mergedModelFromBundles:bundles];
Step 4 : associate the datamodel with the datastore (= the file) via a coordinator
NSPersistentStoreCoordinator *coordinator = [[NSPersistentStoreCoordinator alloc] initWithManagedObjectModel:model];
[coordinator addPersistentStoreWithType:NSXMLStoreType configuration:nil URL:url options: nil error:&error];
Step 5 : Get the context
context = [[NSManagedObjectContext alloc] init];
[context setPersistentStoreCoordinator: coordinator];
Step 6 : Save some data to the file
NSManagedObject *score = [NSEntityDescription insertNewObjectForEntityForName:@"HighScores" inManagedObjectContext:context];
[score setValue:@"bla bla" forKey:@"name"] ;
[score setValue:[NSNumber numberWithInt: 100] forKey:@"score"] ;
[score setValue:[NSNumber numberWithInt: 1] forKey:@"rank"] ;
[context save: &error ] ;
Et voila, we have a simple way of saving data to a file.
In a next message I'll discuss how to retrieve data and do some more complex queries on files.
Monday, 2 March 2009
Drawing in views: rectangles
1. You want absolute performance and less accuracy then you can use the functions defined in NSGraphics.h (NSFrameRect, NSRectFill etc).
2. You need absolute accuracy and don't care so much about performance then you can use the methods defined in NSBezierPath.
(the reason why the NSBezierPath is less performant is explained in this article ).
The following code extract is from a drawRect: method of a custom view :
It shows the different methods of drawing and filling a rectangle.
NSBezierPath *aPath ;
NSBezierPath *myPath ;
// reset the bounds
[self setBounds: NSMakeRect(0,0,1000,1000)] ;
//---------------------------------
//1. filling rectangles
//---------------------------------
[[NSColor grayColor] set] ;
// convenience method for filling a rectangle
// less precise , but good performance
// C functions defined in NSGraphics.h
NSRectFill( rect ) ;
// filling a rectangle using a class method of NSBezierPath
[NSBezierPath fillRect: NSMakeRect( 0,500,75,75) ] ;
// filling a rectangle using an instance method of NSBezierPath
// this usefull if you want to do additional drawing in that path
myPath = [NSBezierPath new] ;
[myPath appendBezierPathWithRect: NSMakeRect ( 600,0,80,80) ] ;
[myPath fill] ;
// -----------------------------
//2. drawing a rectangle
//------------------------------
[[NSColor redColor] set ] ;
// drawing a rectangle using a class method of NSBezierPath
[NSBezierPath strokeRect: NSMakeRect( 500,500,80,80 ) ] ;
// drawing a rectangle using an instance method of NSBezierPath
// this usefull if you want to do additional drawing in that path
[[NSColor greenColor] set ] ;
aPath = [NSBezierPath bezierPathWithRect: NSMakeRect( 450,600,100,100) ] ;
[aPath stroke] ;
// absolute performance, less precise
// C functions defined in NSGraphics.h
NSFrameRectWithWidth( NSMakeRect( 700,700,70,70), 10 ) ;
NSFrameRect( NSMakeRect( 0,700,80,80 ) );


